Yesterday, I have integrated Travis-CI for this repo on Github. Here you can check the latest details about my repo integrated with Travis-CI.
For everyone, who’s not aware of what is Travis-CI.org?
Travis CI is a hosted, distributed continuous integration service used to build and test software projects hosted at GitHub. To know more, wiki.
Continuous Integration (CI) is a development practice that requires developers to integrate code into a shared repository several times a day. Each check-in is then verified by an automated build, allowing teams to detect problems early.Source: Google.com
As soon as your build will successfully pass, you may add live build status badge on your Github repo. It should look like this if passes successfully.
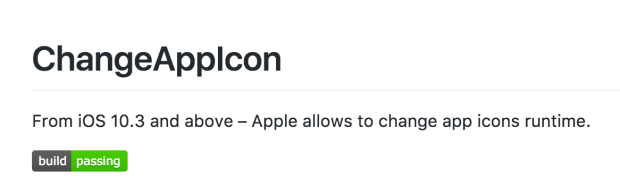
Figure 1. Showing Travis Build status: passing.
All sounds good so far? How did I do that?
Let’s begin.
I have setup a Swift project to integrate it with Travis-CI.
Step 1: Login/SignUp at Travis-CI.org
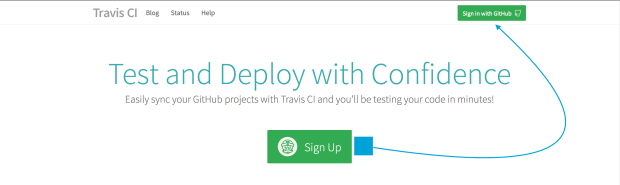
Figure 2. Showing Login/SignUp at Travis-Ci.org
Step 2: By clicking on SignUp or SignIn with Github button you should be redirected to Github.com. Why Github? As Travis-CI is flawlessly working with Github.
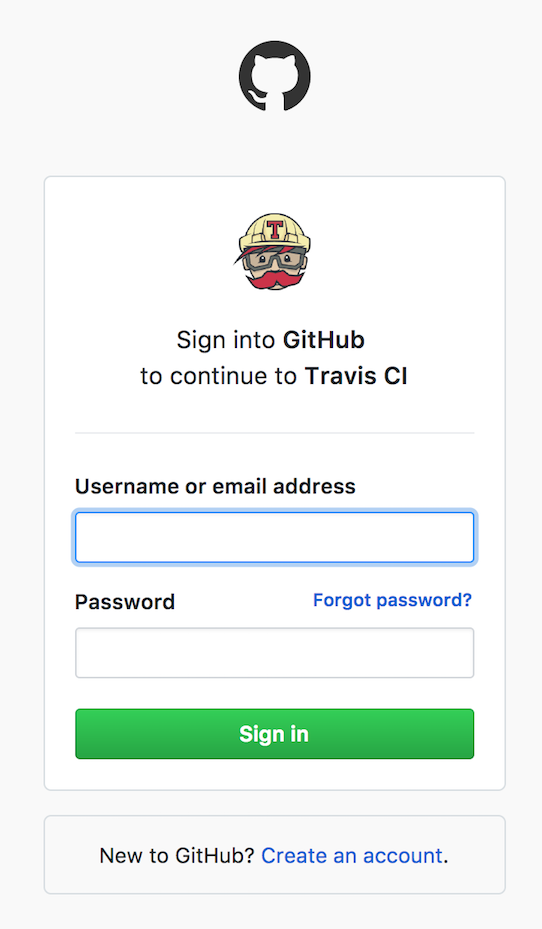
Figure 3. Github Login Page for Travis-CI authorization.
Step 3: Kindly login with your Github credentials and when ask for authorization, don’t hesitate to grant access, this is mandatory as Travis-CI is going to read everything in your Git account. Don’t worry, if you don’t want you can always revoke your Github account access from Travis-CI from here.
Step 4: I believe, you should already have one Git (repository) which you want to build (integrate) with Travis. Goto your Travis-CI account and select your public repository.
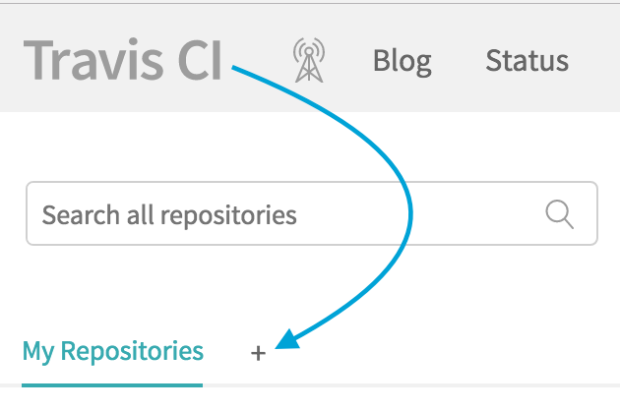
Figure 4. Add Your public repository by clicking on + (plus)
Step 5: By clicking on + (plus), you should see the list of your Public repositories. Enable the repo which you want to build.
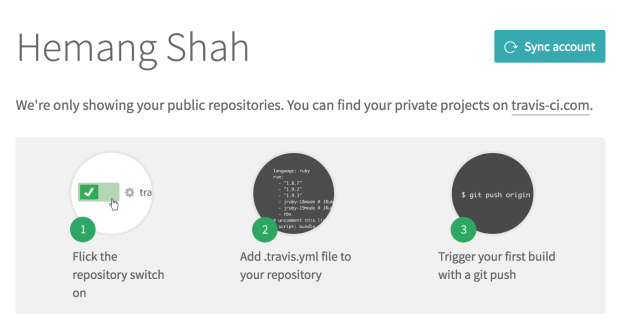
Figure 5. Steps to Integrate Travis-CI with your Repo.

Figure 6. Showing ChangeAppIcon repo (Build Checking is Disabled)

Figure 7. Showing ChangeAppIcon repo (Build Checking is Enabled)
Step 6: Now open Your Project in Xcode for which you wants to integrateTravis-CI, we need to make a sharable scheme to let Travis-CI can build on behalf for you.

Figure 8. Click on Your Project Name to see the Scheme Menu.
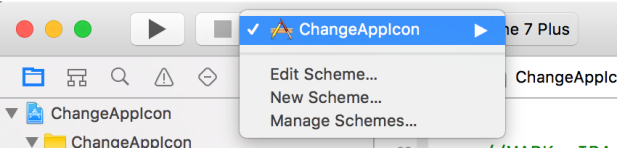
Figure 9. Showing Scheme Menu
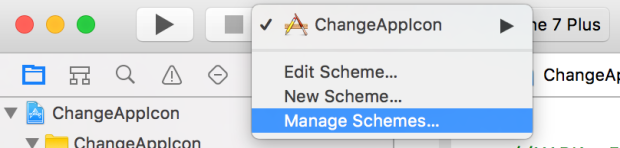
Figure 10. Select Manage Schemes
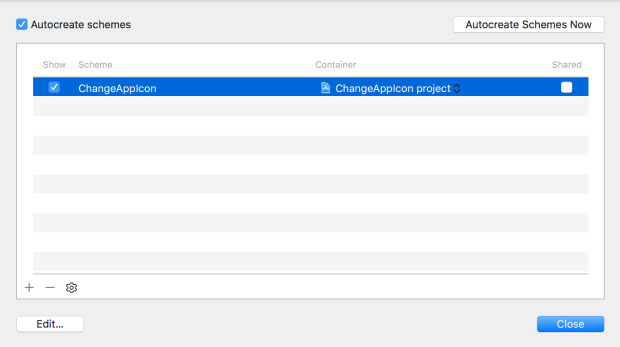
Figure 11. Choose the scheme of your Project

Figure 12. Check “Shared” to make it available outside your Project.
This is also available from Xcode > Product > Scheme > Manage Schemes…
Step 7: Open Github.com, and select the project for which you want to integrate Travis-CI.
You should add “.travis.yml” file for this integration. By reading this file, Travis-CI can understands the configurations of your Project.
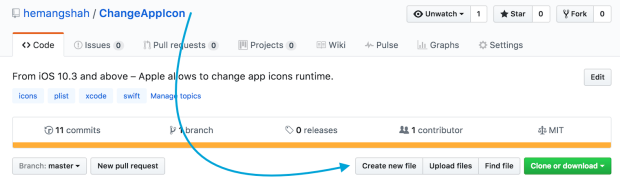
Figure 13. Click on “Create new file” to add a new file.
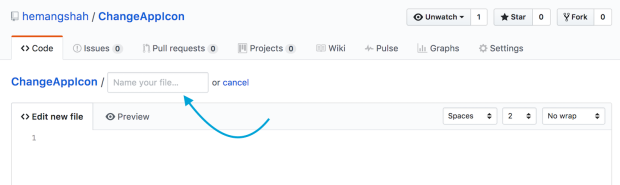
Figure 14. add following as file name. “.travis.yml” [ See the . (dot) ]
Step 8: For my project, I need to add following in that file.
osx_image: xcode8.0
language: objective-c

xcode_project: ChangeAppIcon.xcodeproj

# whitelist
branches:
only:
- master
- osx_image: The current version of Xcode which you want Travis to build.
- language: objective-c (for Swift as well)
- xcode_project: YourProjectName.xcodeproj
- #whitelist: This is an example of a comment.
- branches:
- only: We are specifying that we only want to check on the master branch. No other branches.
- In our case, it’s master.
Step 9: Save the file for last step.

Figure 15. After saving you should see “.travis.yml” file in your repo.
Remember, you should create the file in top of your Git.
Step 10: Still remember the Step 6th? We have checked “Share” the scheme but didn’t commits the code. In order to make travis to work you should once commit after you enable Travis for your repository in Step 5th.
Step 11: Commit the code.
As soon as you commits, a minute or two, Travis will execute nicely and checks for the “.travis.yml” file in your repo. It reads the configuration to understands the following:
- Which Project to build?
- Which Branch to build?
- For which Target?
- For which Language?
If everything is setup properly you should receive an email stating. Build Passes. Or Build Failing in improper case.
In my case, 4 builds were failed and the 5th one worked!
You can see the build history here.
Bonus Step: To get the build status badge, go to Travis-CI.org and select Your Repo
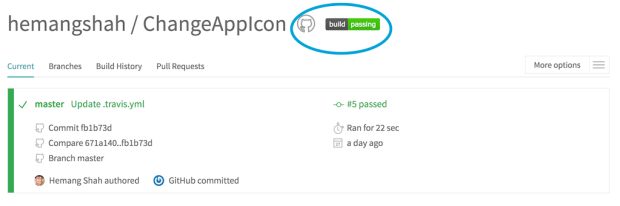
Figure 16. Click on “Build Passing” button (See the Circled) – It’s not necessary to have this status for your repo.
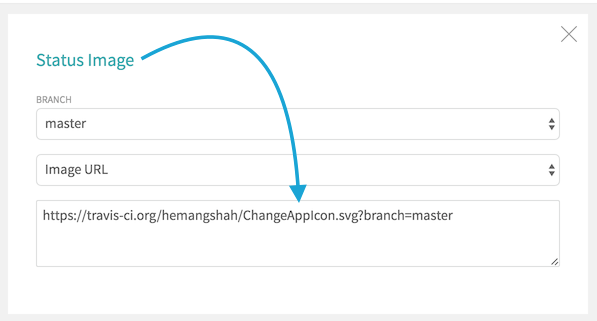
Figure 17. You will have different options to take away your repo status badge.
I choose “Markdown Text” instead of “Image URL” to use it inside my Project’s README.md file on Github.
[](https://travis-ci.org/hemangshah/ChangeAppIcon)
Some more references to understand Travis-CI and different integration possibilities:
- For Beginners by Travis-CI.org
- Building Obj-C/Swift Project by Travis-CI.org
- Integration Travis-CI with Swift Project by szulctomasz.com
- Travis in iOS by gigsterous.github.io
- Travis-CI by objc.io
- Travis-CI Tutorial by Raywenderlich.com
Alternatives for Travis-CI.org:
More reads on Continuous Integrations:
